


Leaking Pipe: Signs, Causes and Safe First Steps
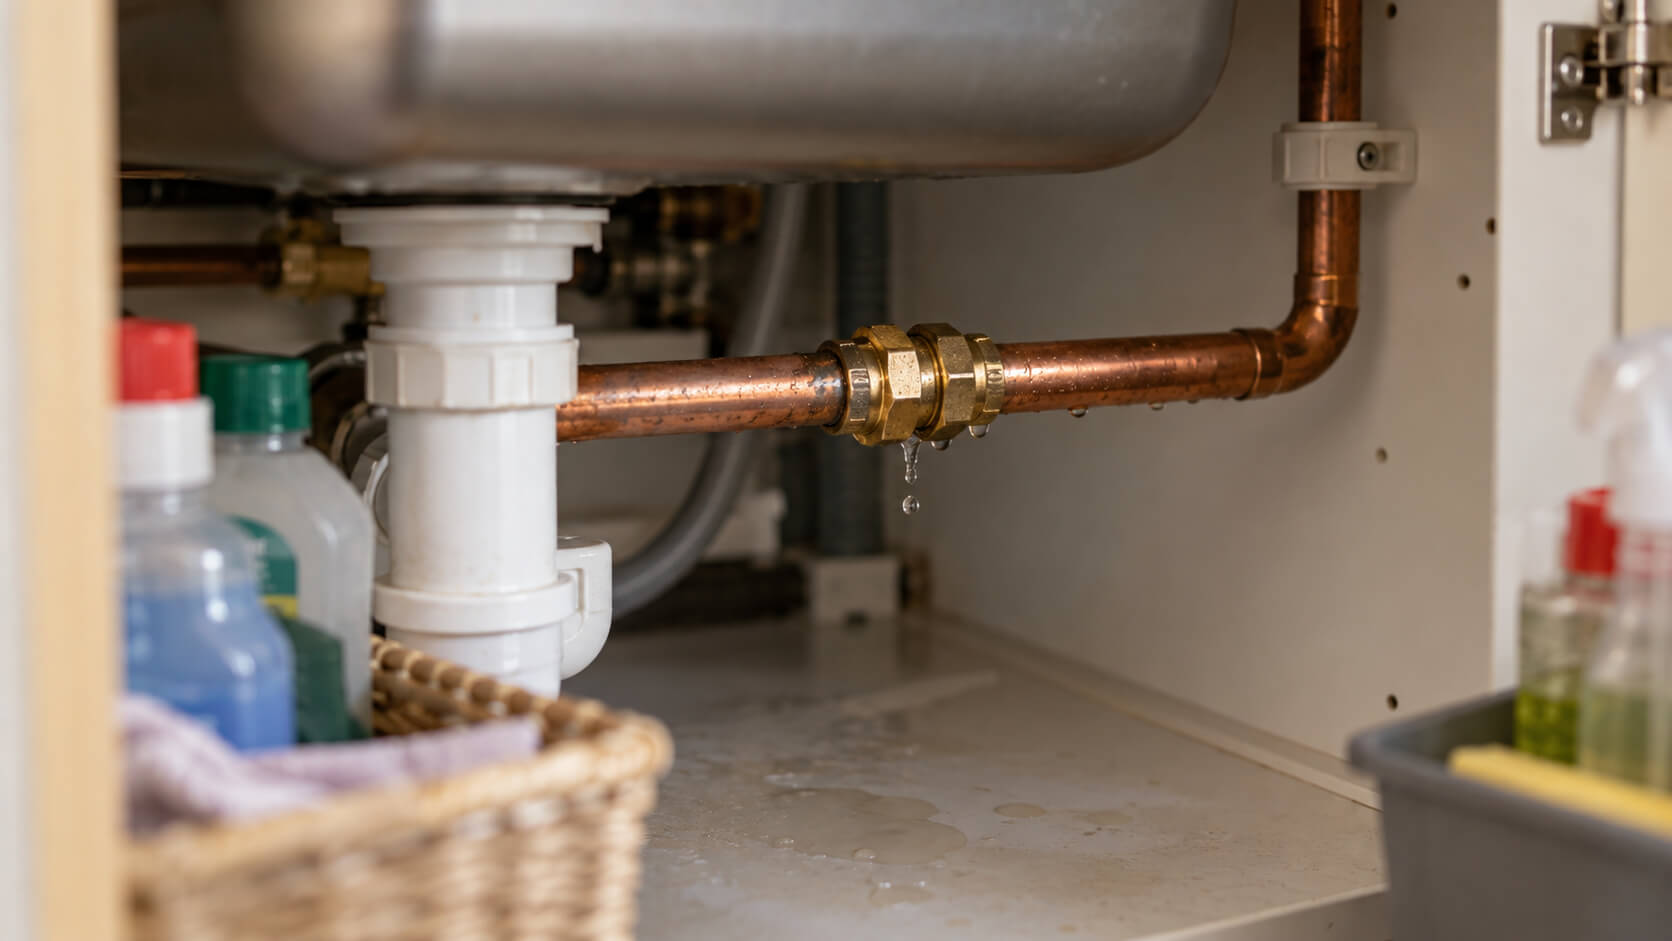
A leaking pipe can release water from a joint, connection or damaged section of domestic pipework. The first priority is to identify where fresh water is appearing, protect the surrounding area and isolate the water supply where this can be done safely.
This guide explains the common signs and causes of leaking water pipes, safe first checks, how to limit water damage and when the source needs further investigation rather than another temporary fix.
Checks for a Leaking Pipe
- Dry the area first and check where fresh water appears again
- Check visible pipe joints and connections for active dripping or seepage
- Isolate the water supply if the leak is continuing and this can be done safely
- Keep water away from electrical fittings, sockets and appliances
- Avoid forcing fittings or relying on a temporary seal if the source is unclear


Who will come to my home?
A certified local plumber from our vetted network, on the day and time you choose. You get a confirmation by email as soon as you book.
Are the parts included?
Small parts like washers, seals, valves and flush mechanisms are always included: the plumber brings the right one. For things you choose, like taps, toilets or radiators, you can supply your own or the plumber brings a standard one, as shown on your quote.
What if the plumber finds something else?
The fixed price covers the work on your quote. If the plumber finds something different on site, they explain it and quote it before starting, and you decide whether to go ahead.
What does the call-out fee cover?
When a fault needs to be found first, the plumber diagnoses it at your property and repairs what they can on the spot, with up to 1 hour of work included.
Do I pay now?
No. You see the price, then pick a date and time. Payment is only confirmed at checkout, and cancellation is free.

Recently booked jobs



Where a Leaking Pipe Can Start
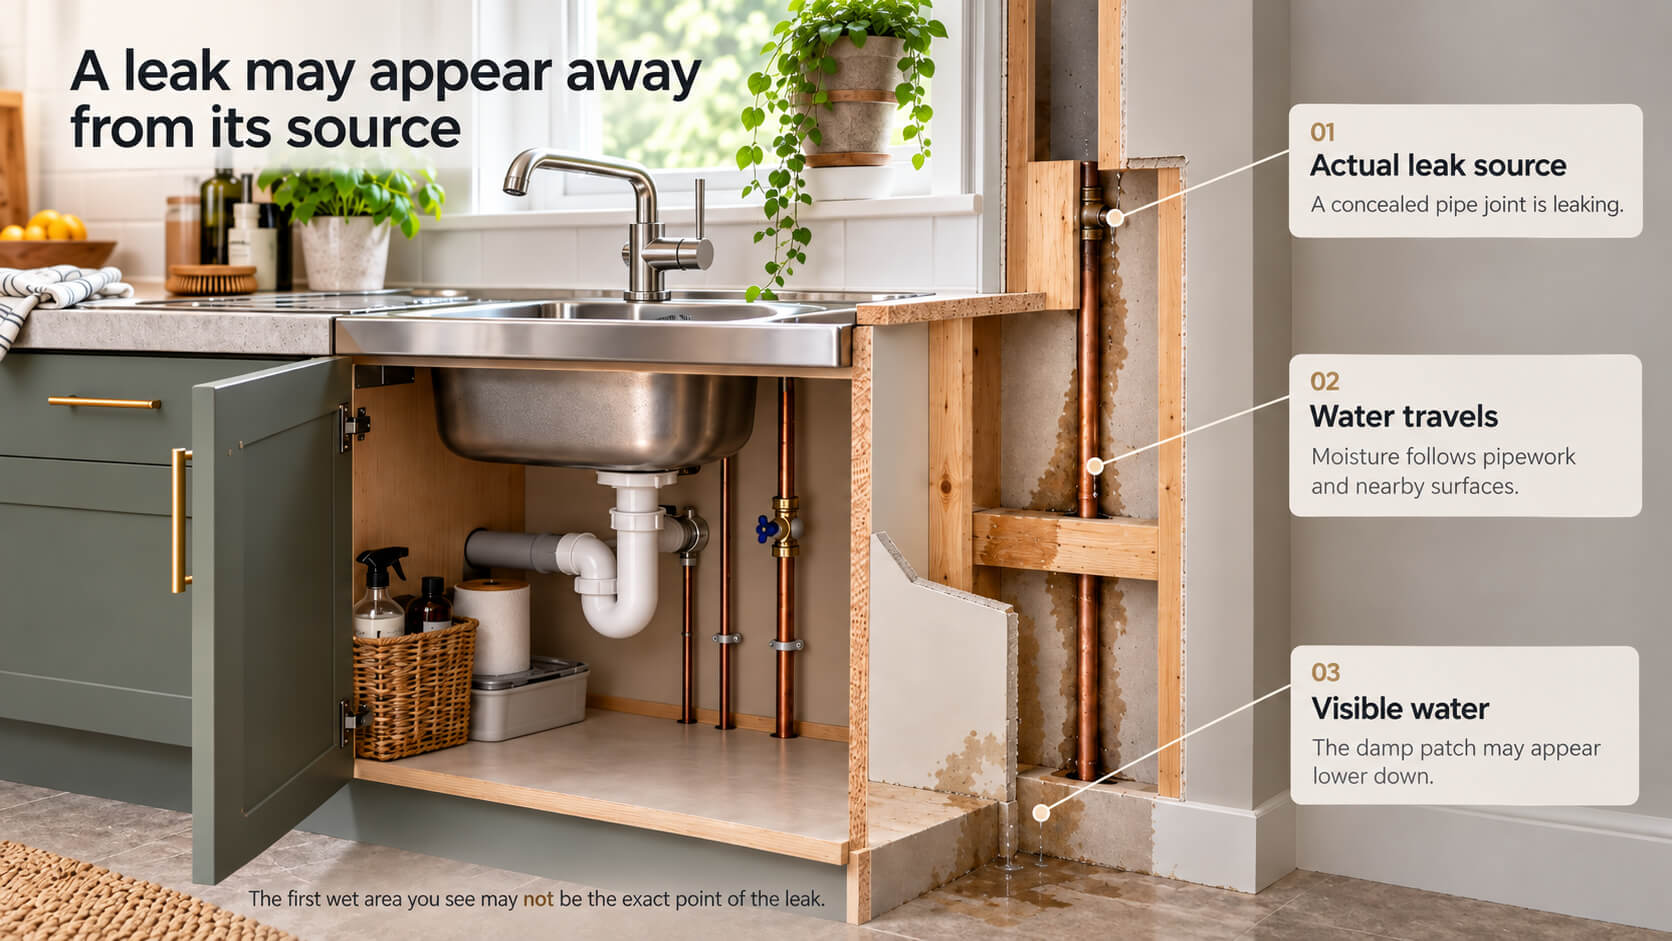
A leaking pipe may release water from a joint, connection or damaged section of pipework, and the first visible drip is not always the exact point where the leak begins. Water can travel along a pipe, fitting or nearby surface before it becomes noticeable, so the area should be dried first and then checked for the first fresh sign of moisture.
The location and timing of the leak help narrow the cause. A steady drip from a visible connection suggests a different problem from water appearing through a wall or ceiling, while a leak under a sink may come from either the water-supply pipework or the waste system.
What does the leak pattern suggest?
- Water appears even when the sink or appliance is not being used
- A pressurised water-supply pipe, joint or connection may be leaking.
- Water appears only while a sink or basin is draining
- The source may be the trap, U-bend or waste pipe rather than the water-supply pipework.
- Water is clearly coming from a local isolation valve
- This is a valve-specific fault and should be checked separately from a generic pipe leak.
Leak From a Pipe Joint or Connection
Fresh water forming directly around a pipe joint or connection usually points to the joint itself or the immediately connected pipework. Dry the fitting and nearby pipe first, then observe where the first new moisture appears rather than relying on where the water eventually drips onto the floor.
A joint that continues to seep should not simply be tightened repeatedly. Different connection types seal in different ways, and excessive force can damage the fitting or make an existing leak worse.
Leaking Water Pipe Under a Sink
A leak under a sink should first be separated into supply-side pipework and waste-side drainage. Water appearing from a pressurised supply pipe or its connection belongs to a leaking-pipe diagnosis, while water escaping from a trap, U-bend or waste connection is a drainage fault rather than a water-supply pipe leak.
Dry the area and check whether the leak appears while the taps are not being used or only when water drains from the sink. That timing can help distinguish a pressurised supply leak from a waste-side leak without dismantling either system.
Split, Cracked or Damaged Water Pipe
A split or damaged pipe can produce anything from a slow seep to a fast continuous escape of water. Visible damage, corrosion, previous freezing or movement around the pipework can all increase the likelihood that the pipe itself rather than a nearby joint is leaking.
If water is escaping continuously, priority should be given to isolating the supply and limiting damage rather than trying to complete a permanent repair while the pipe is still under pressure.
How to Stop a Leaking Pipe Safely
The safest first response to an active water-pipe leak is usually to reduce or stop the water supply to the affected pipework. Once the flow has been controlled, the source can be assessed more accurately and the surrounding area protected from further water damage.
Do not continue experimenting with fittings while water is escaping near electrical equipment or concealed services. A temporary reduction in dripping is not the same as confirming that the pipe has been repaired.
Isolate the Water Supply First
If the leak is continuing, use an appropriate accessible stop tap or isolation point only where its function is known and it can be operated normally. Avoid forcing a stiff or seized valve, as this can create another leak or damage the valve.
After isolation, check whether the water flow from the leaking section reduces or stops. If the supply cannot be identified safely, or the leak continues despite isolation, further investigation is needed before fittings are disturbed.
Limit Water Damage and Keep Clear of Electrics
Contain escaping water where possible and move vulnerable belongings away from the affected area. If water is reaching sockets, electrical fittings, appliances or other electrical equipment, avoid contact with the wet area and treat the electrical risk separately.
Water can also travel into flooring, walls and ceilings beyond the visible leak, so a small surface drip does not always indicate that the surrounding area is dry.
Temporary Seals Are Not Permanent Repairs
Tape, sealants, clamps and other temporary containment methods should not be treated as evidence that the underlying pipe or joint fault has been repaired. Their suitability depends on the pipe material, the exact location of the leak and whether the section remains pressurised.
If a temporary measure reduces the leak, continue to monitor the area and arrange for the actual fault to be identified rather than repeatedly adding more material around an unknown defect.
When a Leaking Pipe Needs Further Investigation
A leak needs further investigation when the source cannot be seen clearly, the water returns after a temporary measure or the visible moisture does not match an accessible pipe joint. In these cases, the point where water appears may be some distance from the actual defect.
The next step should be based on the location and type of pipework involved rather than continuing to tighten fittings or open concealed areas without evidence of where the leak begins.
Leak Hidden in a Wall, Floor or Ceiling
Water staining, damp patches or dripping through a ceiling can indicate concealed pipework, but they do not prove that the pipe directly behind that surface is the source. Water may travel along joists, pipes or building materials before becoming visible.
Before opening finishes or flooring, check for accessible pipework above or nearby and consider whether the symptom could instead come from a bathroom fitting, waste pipe, heating system or another source outside this page's water-supply pipe scope.
The Leak Returns After a Temporary Fix
A leak that returns after being temporarily contained usually means the underlying joint, fitting or pipe defect is still present. Repeatedly applying tape, sealant or additional tightening can hide the original source without resolving it.
At that stage, the affected section should be identified properly so the repair matches the pipe material, connection type and cause of the leak.
When the Leak Is From an Isolation Valve
If the water is clearly coming from a local isolation valve rather than the surrounding pipe or joint, the fault becomes a component-specific valve problem. Leaks around the valve body, operating screw or its connections require a different diagnosis from a generic leaking pipe.
Use the Isolation Valve Leaking guide for the valve-specific checks and fault patterns rather than treating the valve as a general pipe leak.
Need help with a leaking pipe? Describe the problem and get guidance on the next step.
Ask the Plumbing AssistantFrequently Asked Questions About Leaking Pipes


Possibly, but cover depends on the cause of the leak and the terms of your home insurance policy. Some policies may cover resulting water damage while treating the repair of the failed pipe itself differently. Record the damage, take photographs where safe and check your policy or contact your insurer before arranging major opening-up work solely for a claim.
The cost depends mainly on where the leak is, how accessible the pipework is and what type of repair is required. A visible joint can be simpler to repair than a concealed leak behind a wall or beneath a floor because access and making good may add to the work. An exact cost normally requires the source and extent of the fault to be identified first.
Yes, damaged pipework can deteriorate further, although a small leak does not automatically mean a burst is imminent. Splits, corrosion, freezing damage or movement can weaken a pipe or connection. If the leak is becoming worse or water is escaping continuously, isolate the supply where this can be done safely and have the fault assessed.
A leaking pipe may produce dripping, faint running-water or light hissing sounds, but some leaks are effectively silent. The sound depends on the size and position of the fault and whether the pipe is under pressure. Noise can support a diagnosis, but the absence of a sound does not rule out a concealed leak.