


Isolation Valve Leaking: Causes and Safe Checks
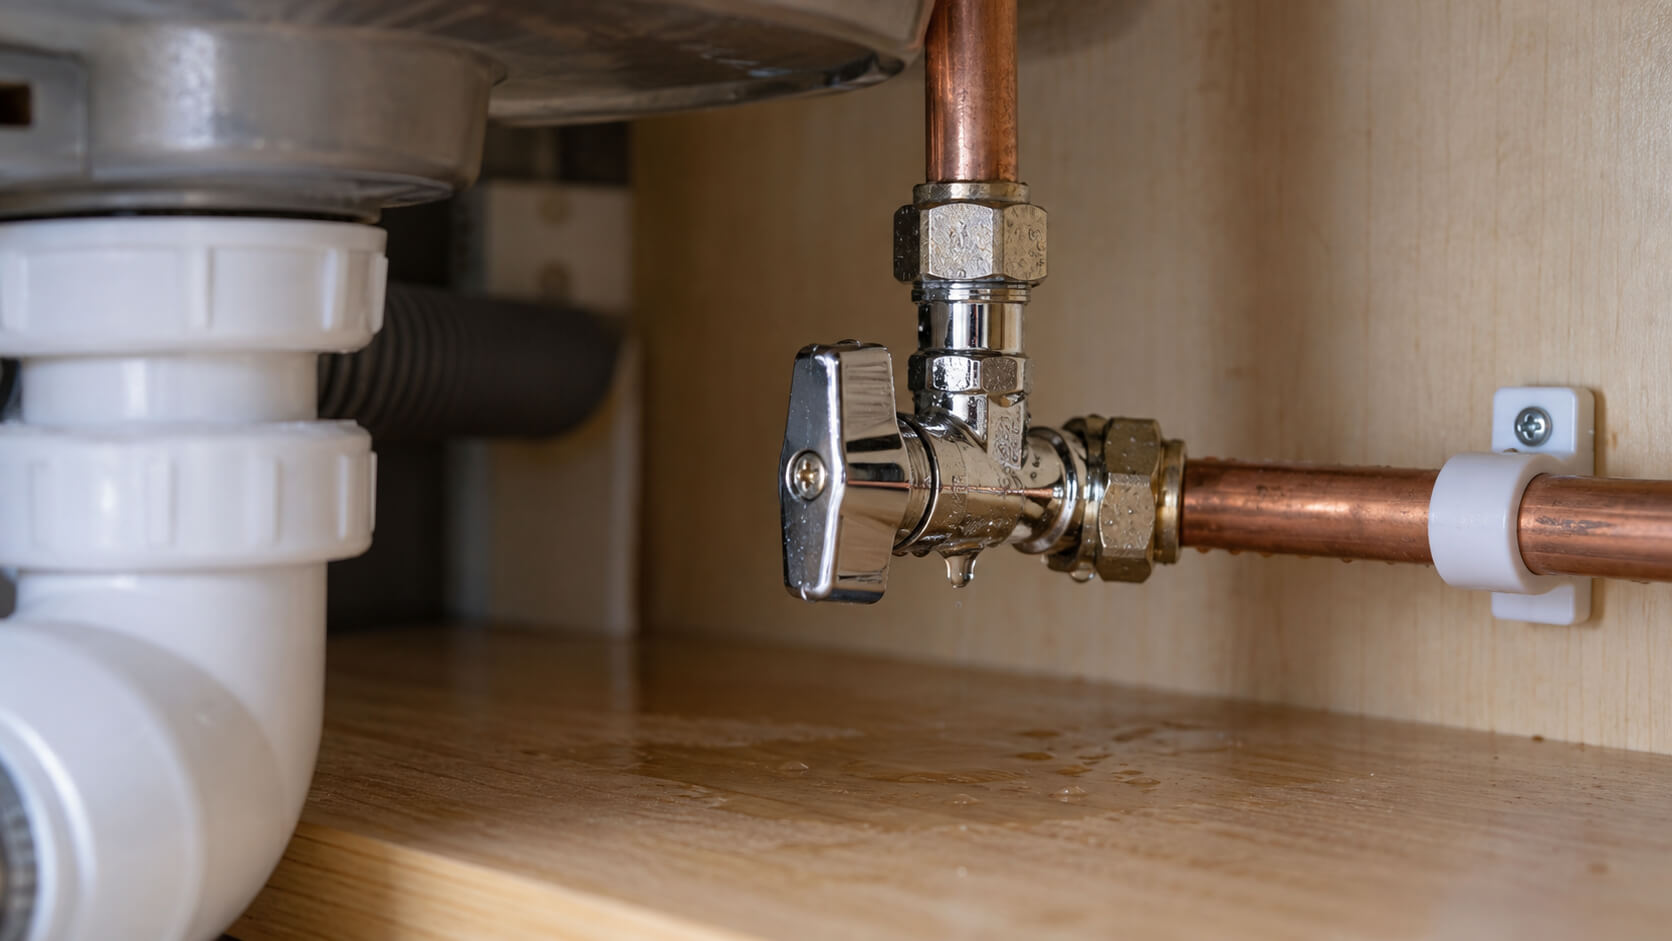
An isolation valve can leak from the operating screw, valve body or one of the connections where it joins the pipework. Drying the fitting first can help show where fresh water is actually appearing rather than where it eventually drips.
This guide explains the common leak points on a domestic isolation valve, safe checks you can make without forcing the fitting and how to recognise when the problem may be coming from the surrounding pipework instead.
Checks for a Leaking Isolation Valve
- Dry the valve and nearby pipework before checking where fresh water appears
- Check whether the leak starts at the screw, valve body or pipe connection
- Isolate the water supply before disturbing the fitting where this can be done safely
- Do not force a seized screw or overtighten a leaking compression nut
- Check whether water is actually travelling from an adjacent pipe or joint


Who will come to my home?
A certified local plumber from our vetted network, on the day and time you choose. You get a confirmation by email as soon as you book.
Are the parts included?
Small parts like washers, seals, valves and flush mechanisms are always included: the plumber brings the right one. For things you choose, like taps, toilets or radiators, you can supply your own or the plumber brings a standard one, as shown on your quote.
What if the plumber finds something else?
The fixed price covers the work on your quote. If the plumber finds something different on site, they explain it and quote it before starting, and you decide whether to go ahead.
What does the call-out fee cover?
When a fault needs to be found first, the plumber diagnoses it at your property and repairs what they can on the spot, with up to 1 hour of work included.
Do I pay now?
No. You see the price, then pick a date and time. Payment is only confirmed at checkout, and cancellation is free.

Recently booked jobs



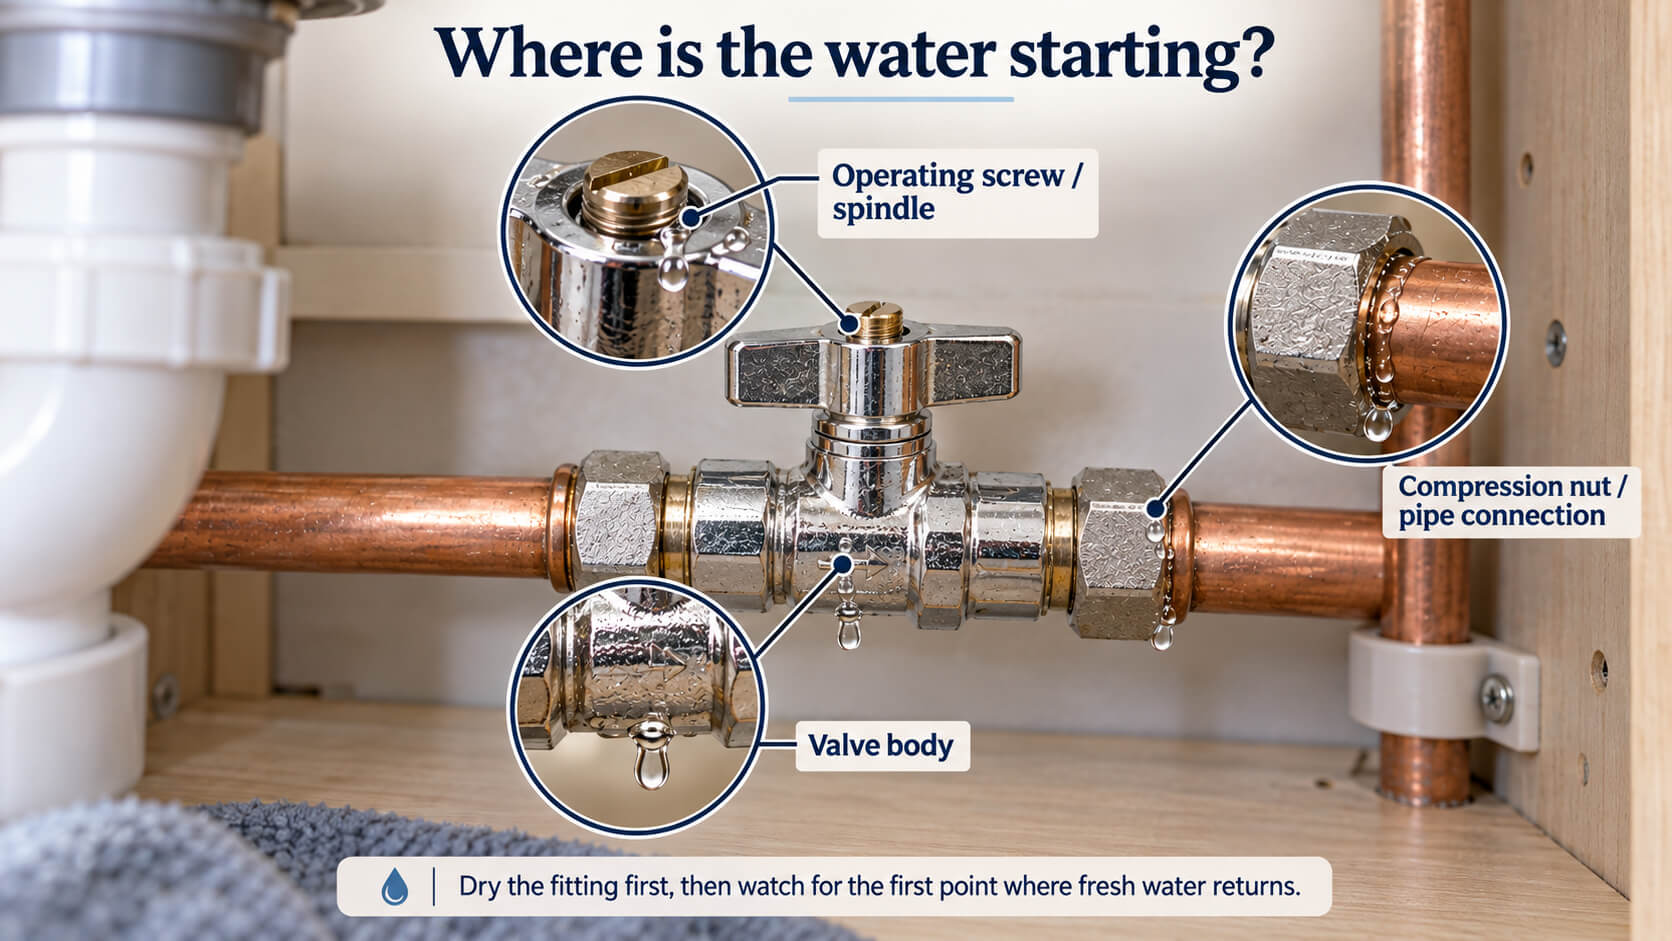
Where an Isolation Valve Can Leak
An isolation valve can leak from the operating mechanism, the valve body or one of the connections where it joins the pipework. Because water can travel across the metal surface before it drips, the lowest wet point is not always the place where the leak started.
Dry the valve and the short sections of pipe immediately beside it, then watch for the first point where fresh moisture returns. This helps separate a valve-specific fault from water travelling along the pipe from another joint.
Leak From the Screw or Spindle
Water appearing around the operating screw or spindle points to the valve mechanism itself rather than the adjoining pipe connection. A small amount of moisture may collect around the centre of the valve before running down the body, which can make the leak appear larger than its actual source.
Do not repeatedly turn or force the operating screw simply to test the valve. If the mechanism feels seized, damaged or unusually loose, further movement can make an existing fault more difficult to control.
Leak From the Compression Nut or Pipe Connection
If fresh water first appears where the valve connects to the pipe, the compression connection may be the source. Check both sides of the valve because water from one connection can travel underneath the fitting and appear to come from the opposite side.
A leaking connection should not automatically be tightened further while it remains pressurised. Excessive tightening can damage the fitting, distort the pipe or make an existing connection fault worse.
Leak From the Valve Body
Water emerging directly through the valve body, a visible crack or a badly corroded area usually indicates that the fitting itself is damaged. This is different from a small leak around a removable connection because there may be no accessible sealing point that can be checked without replacing or disturbing the valve.
If the valve body is visibly split, heavily corroded or releasing water continuously, avoid operating it unnecessarily and isolate the wider water supply if this can be done safely.
Safe Checks Before Repair
The safest first checks do not require dismantling the isolation valve. Confirm where the water first appears, whether the valve and surrounding pipework are visibly damaged and whether the wider water supply can be isolated if the fitting needs to be disturbed.
Isolation valves are intended to allow parts of a domestic water system to be shut off, but a leaking or damaged valve should not be relied upon as the only means of controlling the water while work is carried out.
Dry the Valve and Find the First Wet Point
Start with the valve, pipe and nearby surface completely dry. Use a dry cloth and then observe the fitting without repeatedly operating it. A bead forming around the centre screw suggests a different fault from water appearing around a compression connection.
Also check above and beside the valve. Water running down from another joint can collect around the valve and make a sound fitting look as though it is leaking.
Avoid Forcing or Overtightening the Fitting
Do not use excessive force on a stiff operating screw, nut or valve body. A seized valve may already be damaged internally, while overtightening a compression connection can distort the olive, fitting or adjoining pipe.
If normal light operation does not move the valve, or the fitting begins leaking more heavily when touched, stop the check rather than continuing to apply force.
Isolate the Water Before Disturbing the Valve
If the isolation valve itself needs to be loosened, removed or replaced, the water feeding that section must first be controlled safely. A local valve that is already leaking may not provide dependable isolation for work on its own body or connections.
Where the leak is increasing, the wider supply cannot be isolated confidently, or water is reaching electrical equipment or appliances, avoid further DIY work until the water can be controlled safely.
When the Leak May Be From the Pipework
A wet isolation valve does not always mean the valve is the original source of the leak. Water can travel along copper or plastic pipework, around a compression fitting or down from a connection positioned above the valve.
Identifying the first point where clean, dry pipework becomes wet helps prevent replacing a valve when the actual fault belongs to the adjoining pipe or joint.
Water Is Coming From the Adjacent Pipe or Joint
If fresh water clearly starts on the pipe or another joint before reaching the isolation valve, the problem falls outside a valve-specific fault. Check the surrounding area without dismantling the valve simply because it is the most visible fitting.
If the source is the surrounding supply pipe or joint, use the leaking pipe guide for the wider pipework diagnosis and safe next steps.
The Valve Is Wet but the Source Is Unclear
If the fitting repeatedly becomes wet but the first leak point cannot be identified, further investigation may be needed before any part is replaced. Concealed pipework, restricted access or water travelling from a nearby connection can make the visible valve misleading.
Avoid replacing individual components by trial and error. The useful distinction is whether water originates from the valve mechanism, one of its connections or the surrounding pipework.